Showing posts with label Breads and Baked Goods. Show all posts

Monday, June 17, 2013

Flourless Peanut Butter Cookies

Hello, hello. Let's talk about being healthy for a bit, okay? As I was scrolling through my past posts, I realized I wasn't really fulfilling my slogan of "an attempt at healthy living". It was time to live it up. As summer began, my diet became a little cray cray and I completely disregarded exercise. I'm beginning to develop a summer routine though. This post will be a bit of a lecture, so if you're rolling your eyes, please just skip down to the recipe! :) 
Flourless cookies? Damn straight, homies. I swear this isn't some sort of BS. Now, the lecturing is about to begin. I'll go through why flour and gluten were cut out of my diet; benefits of honey (yes these are sugar free); and a little bit of my recent exercise routine, HIIT. 

A few months ago, I began cutting all wheat/gluten products out of my diet because I had stumbled across an article about gluten sensitivity, which I boldly self-diagnosed as a problem in my life. Since I stopped my gluten intake, my overall energy levels have increase and my stomach no longer hurts from the wretched bloating. Now, there are mixed professional beliefs out there; some believe taking gluten out of a diet is more detrimental than keeping it in the diet, while others believe that cutting gluten out can improve overall energy levels and health. I'm no professional, but from my experiences I do believe that cutting as much gluten as possible out of your life will help with fatigue, headaches, and bloating. With that being said, you can freely enjoy these cookies, that is, unless you've got peanut allergies.


Now we're onto the benefits of honey. While there are many uses of honey, I'll be focusing on my favorite benefit.

I am one of those people who is allergic to everything outside, basically most of nature-- anything from grasses to hamsters. Lucky me, right? What I'm trying to say is that honey can potentially ease your agonizing allergies (it would be great if honey could fully get rid of allergies though!). How this works is through suppression immunotherapy, which is a method of alleviating allergies through gradually introducing allergens to your body system. Normally, when your body is exposed to allergens, an allergic reaction occurs. 

Let's say a little speck of pollen, or antigen, enters your body through your nostril. This antigen triggers your white blood cells to produce antibodies that help defend your body from the antigen, or the "invader". What then happens is an allergic reaction; the antibody destroys the antigen through promoting the production of chemicals that kill off the antigen. As this is happening, you are experiencing an allergic reaction. For many of us, the luckier ones (let's attempt to be positive, shall we?), we only have irritating reactions that include but are not limited to: watery eyes, itchy throat, runny noses. Others who have it worse can often experience life-threatening consequences. 

Okay, so now that I've given a little bit of an explanation of what an allergic reaction is, I'll very briefly go over how honey reduces allergic reactions through suppression immunotherapy. By introducing local pollens to your body through local honey, allergic reactions eventually become less severe and more tolerable. This method is most commonly known through shot treatments from allergologists, but eating small increments of honey each day can also result with the same effect.

Despite the many benefits of honey, there can be complications as well. For more information on this sweetener, click here.


If you're a true peanut butter lover, I know you'll love these. They're so incredibly soft in the middle, with a little crispy outer edge. Mmm, enjoy!

Flourless Peanut Butter Cookies Recipe: makes 16, adapted from myrecipes
1 cup all natural creamy peanut butter
1/4 cup honey
1 large egg
1 tsp baking soda
1/4 tsp salt

Directions:
  1. Preheat the oven to 325 F (160 C). Line baking sheets with parchment paper.
  2. Stir together the peanut butter, honey, baking soda, and salt. Add the egg and incorporate until smooth. Drop by the Tablespoons, two inches apart on the lined baking sheets.
  3. Bake for 12-14 minutes, or until cookie edges brown. 
  4. Cool on baking sheets for 5 minutes. Transfer to a wire rack and let the cookies cool for about 15 minutes. Cookies best eaten within 2 days.
Notes:
- I used 1/2 cup creamy and 1/2 cup crunchy peanut butter for more of a crunch ;)
- If using all natural peanut butter/homemade , make sure the peanuts were roasted/toasted
- Feel free to add in 2/3 cup chocolate chips!

With Love,
Grace 


Works Cited:
"Allergic Reaction Causes and Triggers: Foods, Medicine, and More." WebMD.com. Ed. Laura J.  
       Martin. WebMD, 14 Aug. 2012. Web. 17 June 2013. <http://www.webmd.com/allergies/guide
       /allergic-reaction-causes>.
Gardner, Karen. "What Are the Benefits of Honey Made Where You Live?" Livestrong.com
       Livestrong, 27 June 2011. Web. 17 June 2013. <http://www.livestrong.com/article/479702-
      what-are-the-benefits-of-honey-made-where-you-live/>.
News Medical Staff. "Suppression Immunotherapies." News-medical.net. News Medical, n.d. Web. 
       17 June 2013. <http://www.news-medical.net/health/Suppression-Immunotherapies.aspx>.

If you enjoyed the post, like my page on Facebook! (or check out my other pages up at the right side of the page)


Saturday, May 25, 2013

Bear Claws


After many years of baking the basics, I've finally mustered up the courage to make a pastry. This is a very late Mother's Day post, but I can't pass up this opportunity to share my experience. Before moving to Shanghai, mom's favorite pastry from any place was always the Bear Claw. A few weeks before Mother's day, I thought about what I'd make and this is what came up.
Since I won't be in close proximity to my family next mother's day, I stepped it up a notch. Bear Claw Pastry is the perfect thing to make if you'd rather spend the time instead of money to show how much you love someone (mushy gushy).

Or you could just treat yourself to a nice pastry. They smell and taste heavenly.
I've been wanting to post this since the day I made it, but with school I've been extremely busy...but now it's over! Happy graduation!
Yesterday was our last day of school. With the Baccalaureate Service and then graduation rehearsal, it finally hit me that I wouldn't be going back to this school after summer. After four years here, my school has sort of become my second home (as much as I hate to admit it). I'll really miss the community and the relationships I've established. While I'm beyond excited to start the new chapter of my life, I don't think I've been this anxious for anything.

Anyways... I digress. 
If you're looking for more of a challenge, make your own pastry puff. Seeing the results of the flaky dough is more satisfying than I imagined. Despite my worries that this would turn into the biggest failure of Mother's day, it turned out to be a huge success! Before Tuesday even came around, 6/6 pastries were gone. Lucky for my mom, I had frozen the other six.

In fact, I encourage that you double the batch and freeze them for whenever you'd like to enjoy a delectable breakfast with a nice cup of dark roast coffee (or tea!).

Enjoy!

Bear Claws: makes 12
Recipe: adapted from here
2 Tbsp & 2 tsp almond paste
2/3 cups ground almonds
2/3 cups finely chopped walnuts
1/8 cup white sugar
1/2 pinch salt (1 smidgen)
1 Tbsp butter
1 egg white
1/4 tsp almond extract
1/2 tsp vanilla extract
3 tsp amaretto liqueur

1 1/2 pounds puff pastry (ingredients from here and directions from here)
1/2 egg
1 1/2 tsp water
1 1/2 Tbsp sliced almonds for garnish
1 1/2 Tbsp confectioners' sugar for dusting

Directions:
  1. Beat almond paste with an electric mixer to break it apart. Add the almonds, walnuts, sugar, and salt; continue mixing until the almond paste is no longer lumpy. Stir in the butter, egg white, almond & vanilla extract, and amaretto liqueur on high speed until it's as fluffy as possible. We'll finish working with this in a bit.
  2. Split the dough in half and place half in the refrigerator. Roll half of the dough out on a lightly floured surface into a rectangle that is about 8 inches wide and 1/4 inch thick. Trim the edges and cut the dough in half lengthwise to make two 4 inch wide strips. On each 4 inch wide strip, divide the dough into three sections, totaling to six rectangle pieces. Place these in the refrigerator, and take out the other half of the dough. Repeat step 2. In the end, there should be 12 smaller rectangles.
  3. Preheat the oven to 400 degrees F (200 degrees C). Line baking sheets with parchment paper. 
  4. Whisk the egg and water together. Spoon a scant Tbsp of filling in the center of each strip. Brush the egg mixture onto the edges of each strip. Fold each strip over the filling and press gently to seal. Use a knife to cut "claws". 
  5. Brush the egg mixture on top of each claw. Sprinkle almonds over the top. Refrigerate and repeat with the other half of the dough.
  6. Bake in the preheated oven until almonds are toasted and the pastry is golden brown, about 25-30 minutes. Cool and dust with confectioners' sugar right before serving.

Notes:
- After step 4, you have the option of freezing the pastries. I individually wrapped each Bear Claw. When I baked the frozen half, I just preheated the oven, brushed the top with egg and water, and then sprinkled almonds over the top. The time should be around the same, just watch for the color changes
- Baking the Bear Claws, or any pastry, is best baked when the dough is cold.
- Keep in mind when making pastry dough, that the more you fold and roll your dough, the more layers and more flaky the dough will be. 
With Love,
Grace

Friday, May 10, 2013

Chocolate Jar Cake

OK...don't hate! This was the only photo of the actual cake that I have. Down below I have photos of before the cake was cooked and after the cake was eaten. After the jar cake was ready, I was way too eager to eat it. This pictured bite was right before I remembered I was supposed to take photos before scarfing the cake down. Oops, guess you'll have to make one yourself! After all, it only takes a few minutes :)

This is a perfect pre-mother's day food to show Mommy some extra love, right?


My first time making mug/jar cake was when I was still in middle school. It seems like ages ago. Perhaps it's been seven years? What I remember is browsing on Internet Explorer on the huge monitor that seems obsolete these days. I'm not quite sure how I found it, but boy oh boy, I was beyond excited.


How it ended was with a spongy, rubbery cake overflowing my souvenir mug with a middle school girl sighing in disappointment. Since then, I've been skeptical of every mug cake I've come across.

No fears though! This is very cake like, what I desire in every chocolate cake: moist, chocolatey, fluffy, satisfying... It's perfect for satisfying that sweet tooth. 


Now I know it's not "healthy", but it's healthy for the soul (I've been doing too much yoga these days if there's such a thing). Plus, it's a single serving size, so you can't really over-indulge, right? (Unless you're actually not lazy and make another one.) Anyways, enjoy!

Tuesday, April 23, 2013

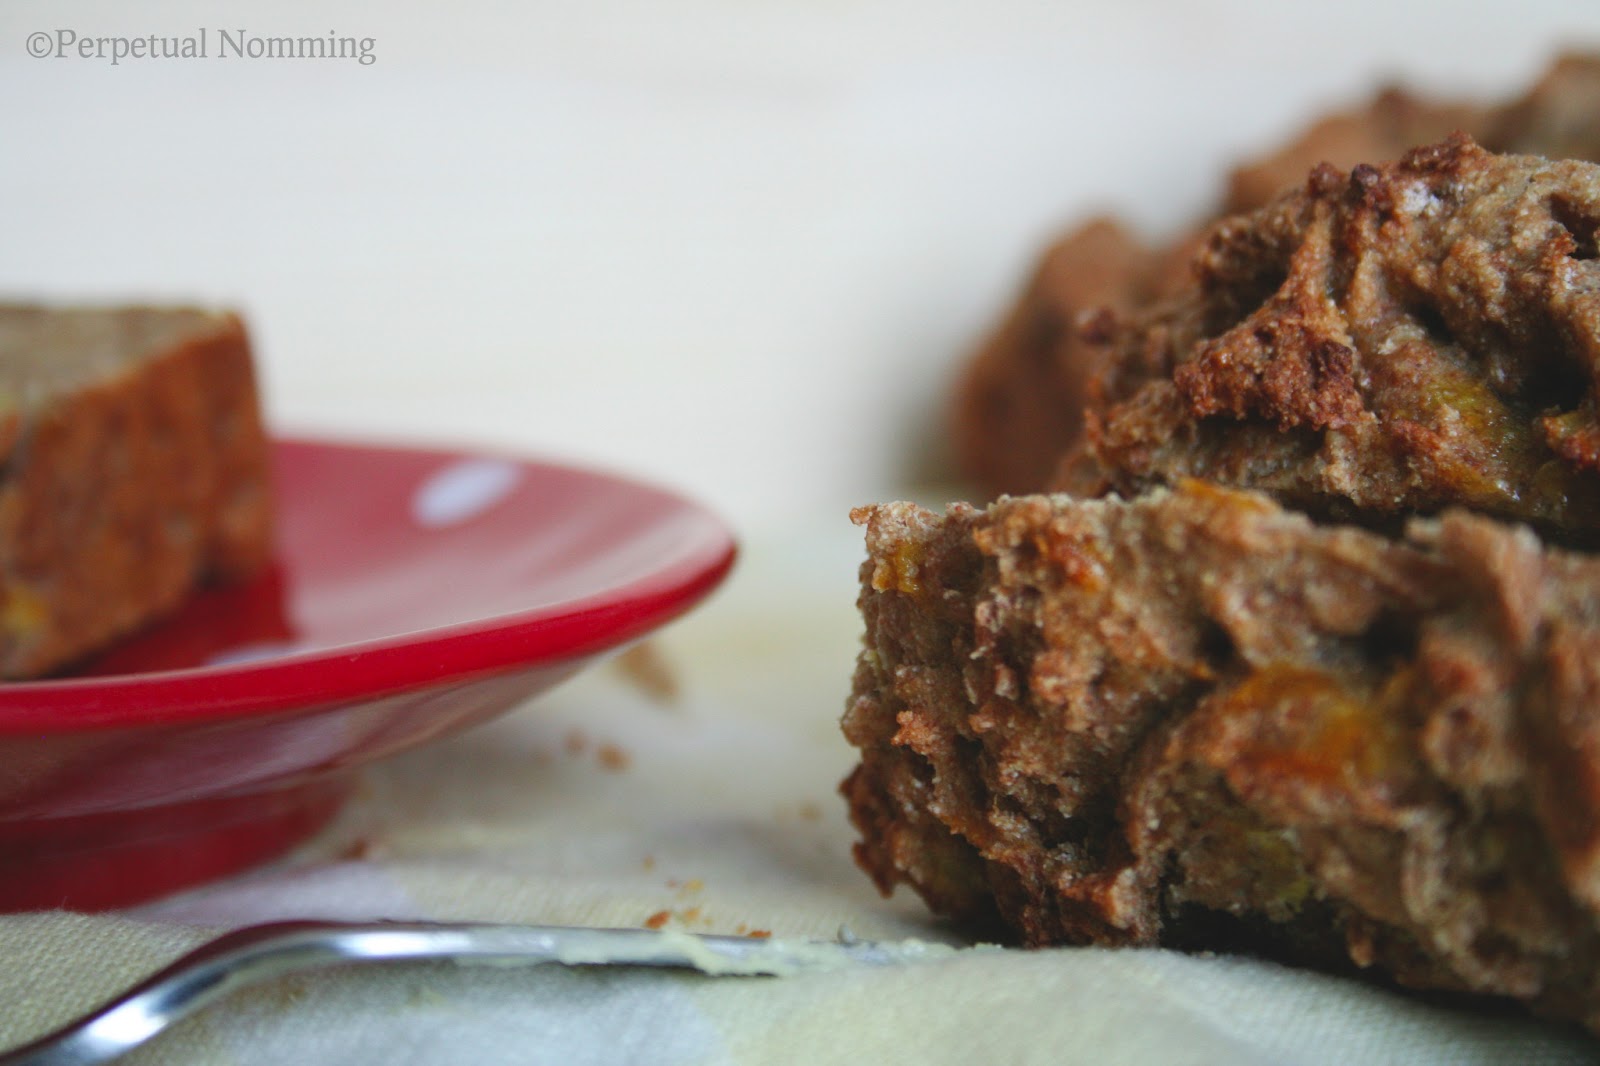
100% Whole Wheat Bread with Banana

 
Before you begin clapping your hands and jumping up and down, hear me out on one thing. This bread is not your typical banana bread, but it's more for sandwich making. An actual sweet and aromatic banana bread is scheduled for sometime next week. 


As the bread baked, I imagined myself downing 3 slices of banana-y goodness. The bread smelled like bananas; the bread had typical banana bread ingredients; the bread was meant to be banana bread.


With my first bite though, I was discouraged. MOM! Come try my bread. She smacked her mouth a few times. Hmm, it's not too banana-y, but it's good! She proceeded by allowing herself to another helping.

The woman said it was good, so be confident that it is. The bread is moist from the Greek yogurt, banana, and applesauce; and dense from the wheat flour. Dense bread is my kind of bread. What I especially love about this is that there's a twinge of banana flavor that is perfect for a peanut butter sandwich; even better, make an Elvis Presley! French toast it up, smother on some peanut butter, and layer on a a banana or two.


If you are a regular wheat bread consumer....please, give this a try. Each bite grew on me. I'm actually a bit embarrassed to say that my mom and I devoured the bread in one sitting, leaving one lone piece for my dad.


Whatever you do, just don't eat the entire loaf at once. Speaking from experience here...it will be the hardest thing to get out of your seat. You'll want to crawl into bed and sleep for 20 hours.


 First one plain, second one buttered...third one plain, fourth one buttered.

Sunday, February 17, 2013

Tip-Top Healthy Chocomuffs


 This doesn't happen often, but these muffins happen to be ones I immediately scarf down straight out of the oven. I only made four in this batch, but they were so good, I made them again. Plus, they're super healthy :) Actually, I believe this are my first healthy chocolate-containing baked good. Score! Motivation to discover and make more mine.

Although I haven't I don't particularly have a sweet tooth these day, I still crave chocolate. So so so, these were perfect; my Tip-top Healthy Chocomuffs (always making up words) are bittersweet and moist, but when you bite into a chocolate chip...mmm you see fireworks. Of course, these fireworks are better than the ones that have been blasting all week here in Shanghai. 

When I saw these on Dashing Dish's blog, I knew I had to have them. To make them more moist, I added applesauce, upped the amount of Greek yoghurt, and sweetened them slightly with Agave nectar.

The best part of these muffins are delish sans flour, oil, and sugar! What?! Totes my fave recipe now.


What I didn't understand was the muffin top. First of all, why is it darker? Second, why am I so lucky?! It frosted itself :) Kind of?

I'm thinking it's because I took them out of the oven to sprinkle chocolate chips on, and then the cool air did something to them. I actually don't know...I'm just making things up.

Wait wait, look at the name of these. I thought I was so clever when I named them. (;


I don't want to bore you with my family all the time, but they're the ones who give me really great feedback. I guess once school starts up again (ugh...Monday), my lovely food-loving friends can start giving me feedback.

Buuut, teens will eat any free food right?


Later in the day, I saw the last chocomuff in the fridge, so I cut the muffin top off. My mom scowled at me, probably because she wanted it.

Okay, I'm going off on a tangent, but I've been obsessed with Greek Yoghurt these days. I eat it with granola, apples, plain, with honey; put it in dressings, muffins, sushi; sub in for mayo...someone please help me before I over-indulge. Jokes, don't stop me. I laaav it! Back to these beauties... 


If you have the time, which you should, these are quick and rewarding to make. You basically dump everything into a blender and voila, a Tip-top chocomuff :)

No, but they're actually super rewarding. I'll break it down for you:
Applesauce: This is high in fiber and vitamin C.
Unsweetened Cocoa Powder: high in fiber and protein, stabilizes blood sugar, gives good cholesterol and gets rid of bad cholesterol, gluten-free, and contains antioxidants beneficial in reducing the risk of cardiovascular disease.
Greek Yoghurt: high high high in protein!, contains probiotics great for aiding digestion, is a good source of calcium :)
Agave Nectar: low glycemic index, meaning it doesn't give an unhealthy blood sugar spike 
Chocolate:  increases endorphins that can decrease stress levels and fight depression, boosts energy levels, and the list goes on. Find more on chocolate at this site.

Monday, February 11, 2013

Almond Vanilla Pound Cake


Code Red Code Red! I'm about to disclose a very important secret for making the best pound cake.
 
My birthday was on the 9th, and school ended on the 7th for Chinese New Year break. Being that friend who fits the female stereotype *ahem loving time in the kitchen*, I spent hours looking for the perfect recipe to make and to bring to school.

Everyone who tried these loved them. A few asked for the recipe, and another asked me to live with her (: The secret of this is baking these babies from a cold oven.

Saturday, February 9, 2013

Vanilla Vanilla


So my senioritis has really been getting to me. I've been baking/cooking like crazy these days. We just got off for Chinese New Year break yesterday, so I finally got around to posting these up!

I was stumbling on Stumble Upon during study hall the other day and was brought to Simply Recipe's Double Vanilla Cupcakes Recipe. I had been wanting to put my vanilla beans to good use, and believe me...this was good.

As these baked, I imagined my house back in Chicago with the fireplace crackling. My heart literally warmed up and my stress disappeared for a few minutes. These cupcakes are fluffy, yet moist, and the frosting is beautifully specked with vanilla bean seeds. When I took my first taste of the frosting, I thought, "Is this the real life?!?" Really though. This buttercream frosting coats your throat in a vanilla velvety blanket, leaving you longing for more. So I downed two more spoonfuls.

Anyways, to get to the point, here's the recipe: it yields about 1 dozen regular sized cupcakes and 30 mini cupcakes


Cupcakes: 
  • 1 & 1/2 + 2 Tbsp All-purpose Flour
  • 1/4 tsp salt
  • 1 & 1/4 tsp baking powder
  • 1/2 cup (113.4 grams) unsalted butter, room temperature
  • 1 cup sugar
  • 1 egg + 2 egg whites
  • 1/2 cup whole milk (I used partly skimmed)
  • 1/4 cup sour cream
  • 1 & 1/2 tsp vanilla extract
  • 1/2 or 1 vanilla bean
Frosting:
  • 1/2 cup (113.4 grams) unsalted butter, room temperature
  • 1 & 1/4 cup confectioner's sugar
  • 1/2 vanilla bean (I used a whole one)
 Directions for Cupcakes:
  1. Preheat the oven to 350 F (175 C)
  2. Cut vanilla bean and scrape out seeds. Place the seeds and halved bean into a saucepan. Add milk.
  3. Simmer these three items for about 3-4 minutes. As soon as it's simmered for a few minutes, turn off the fire and remove from heat. Remove the beans from the pan. McCord (from Simply Recipes) reminds readers that you can wash these beans again after you've washed them. My mom threw them away... ):
  4. In a medium bowl, beat butter for 3 minutes on medium speed. Add sugar and beat again for 3 minutes.
  5. Add the egg and beat for 30 seconds. Then, add the whites, one at a time. Beat these for 30 seconds each.
  6. In another bowl, mix the flour, baking powder, and salt.
  7. Take another bowl, and whisk together the milk, vanilla extract, sour cream. This is now the milk mixture.
  8. Add the flour and milk mixture to the bowl with butter, sugar and egg. Alternate between the flour mixture and the milk mixture, starting and ending with the dry mixture. Remember not to over mix!
  9. Add the mixture to tins. Bake for 18-20 minutes, rotating the pans about half way through at 9-10 minutes.
Direction for Frosting:
  1. Beat the butter
  2. Slowly add the confectioner's sugar
  3. Scrape the vanilla bean to get the seeds out. Beat in the vanilla seeds. 
*for reference of cutting vanilla beans, you can click here

I've been smitten with cakes and cupcakes lately, and it's my birthday, so I have an excuse to eat eat eat. I will post two more recipes soon! ps- I apologize for the bad photos. My camera has not been working with me so I've been using my phone!

Happy Chinese New Year :) Welcome to the year of the snake. Cheers!

© 2012-2013 Perpetual Nomming. All images & content are copyright protected. Powered by Blogger.
 

Template by BloggerCandy.com